
Calendar Event Creation
Step 1 - Open Planning Center
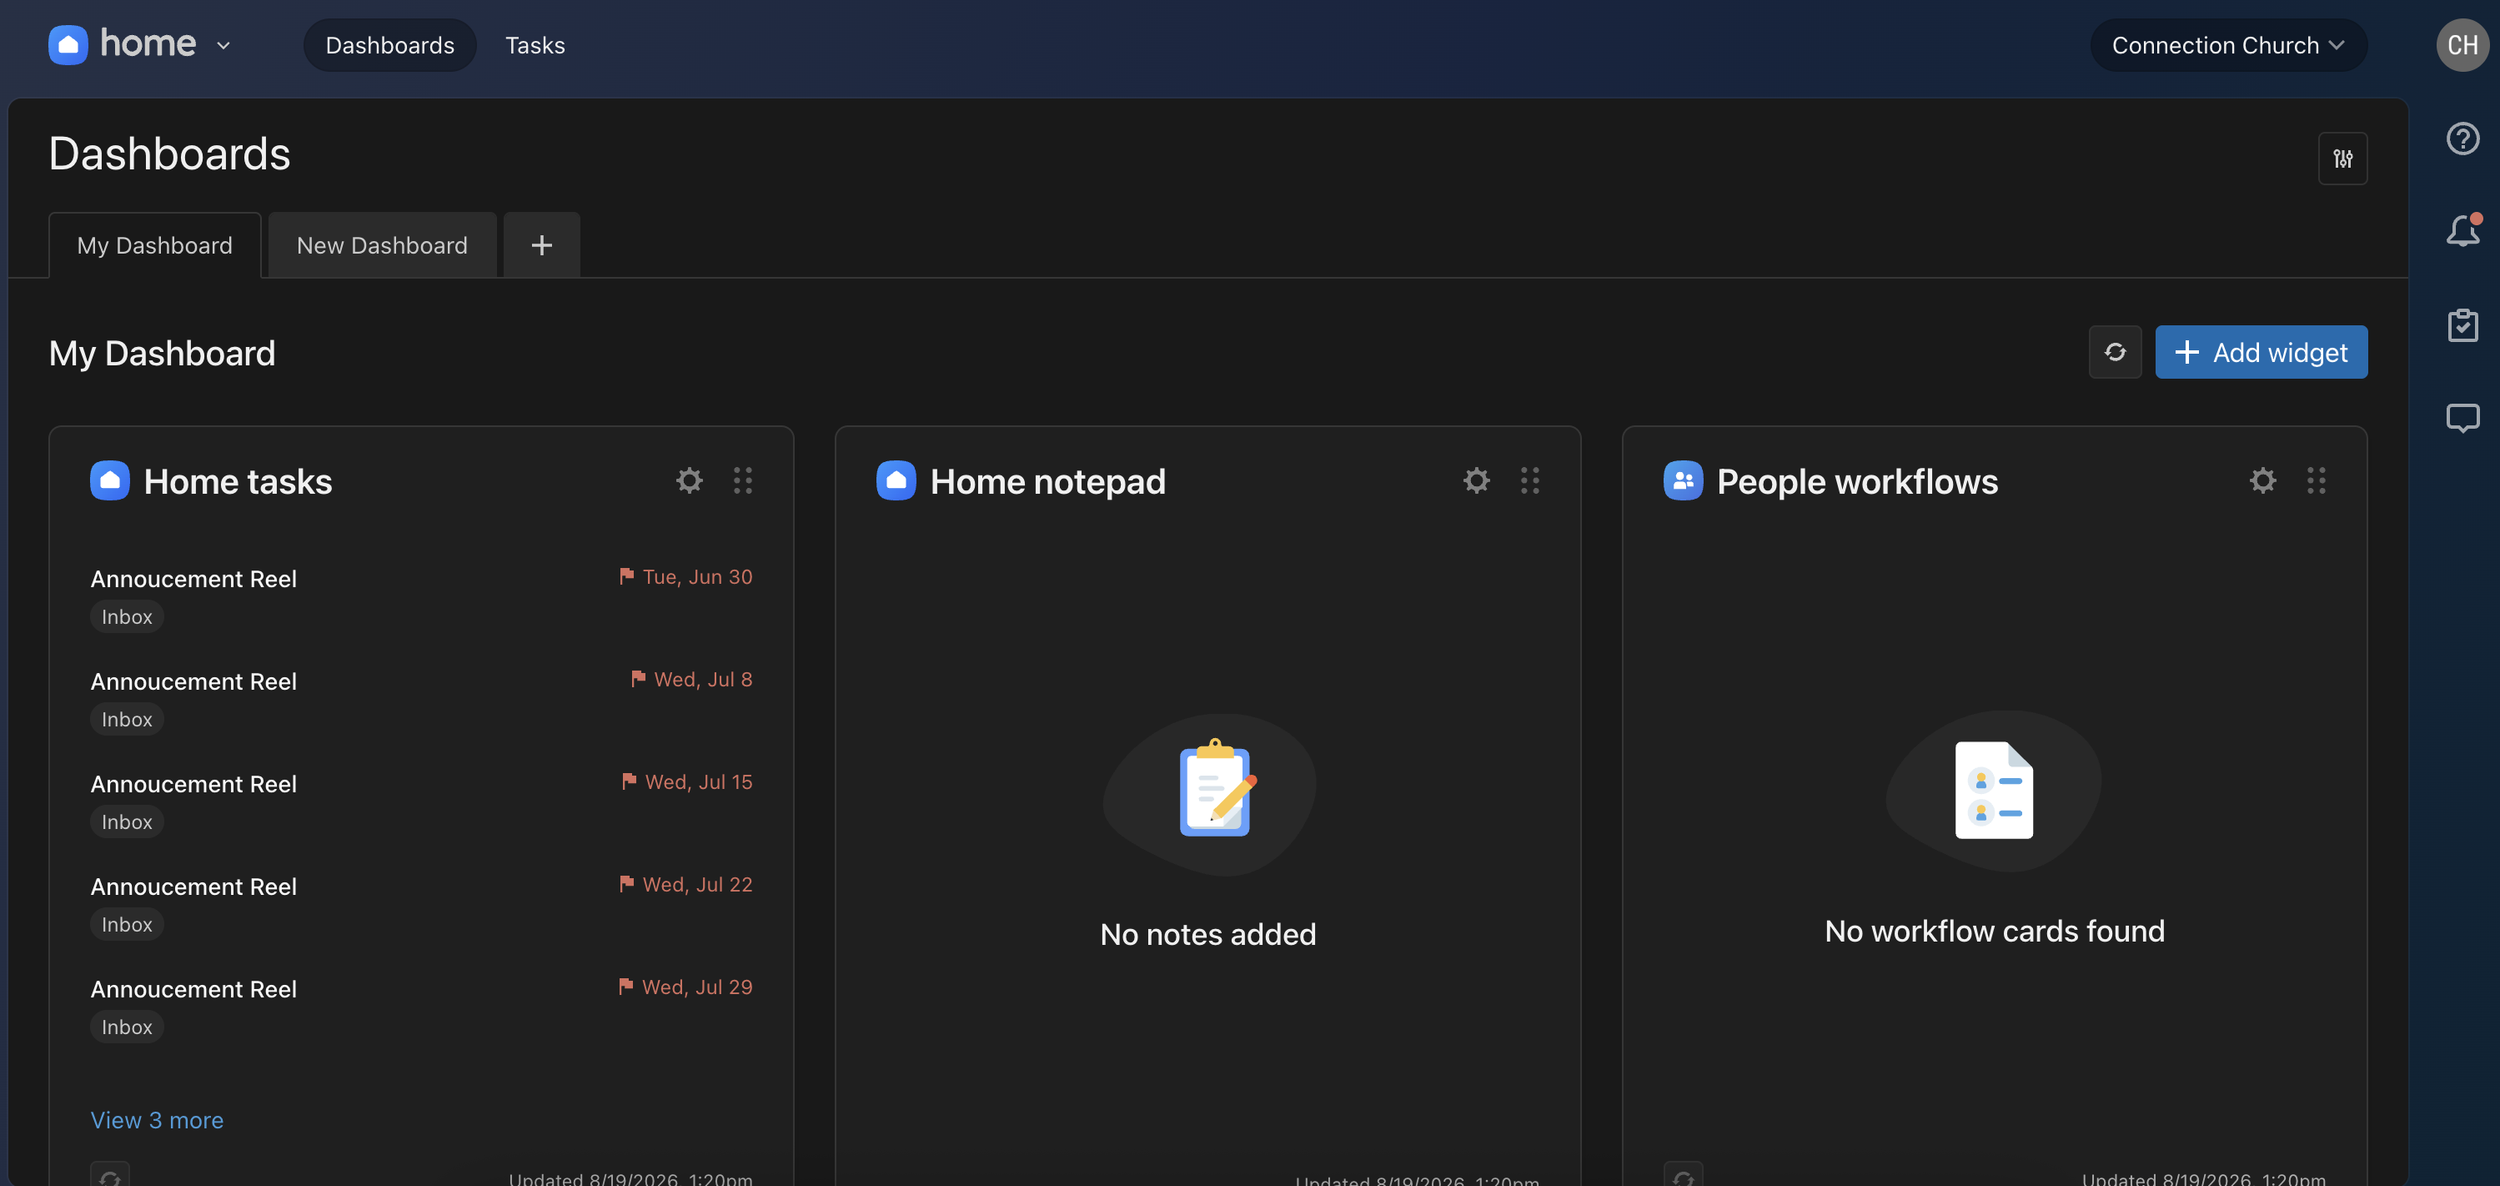
Step 2 - Go to Calendar
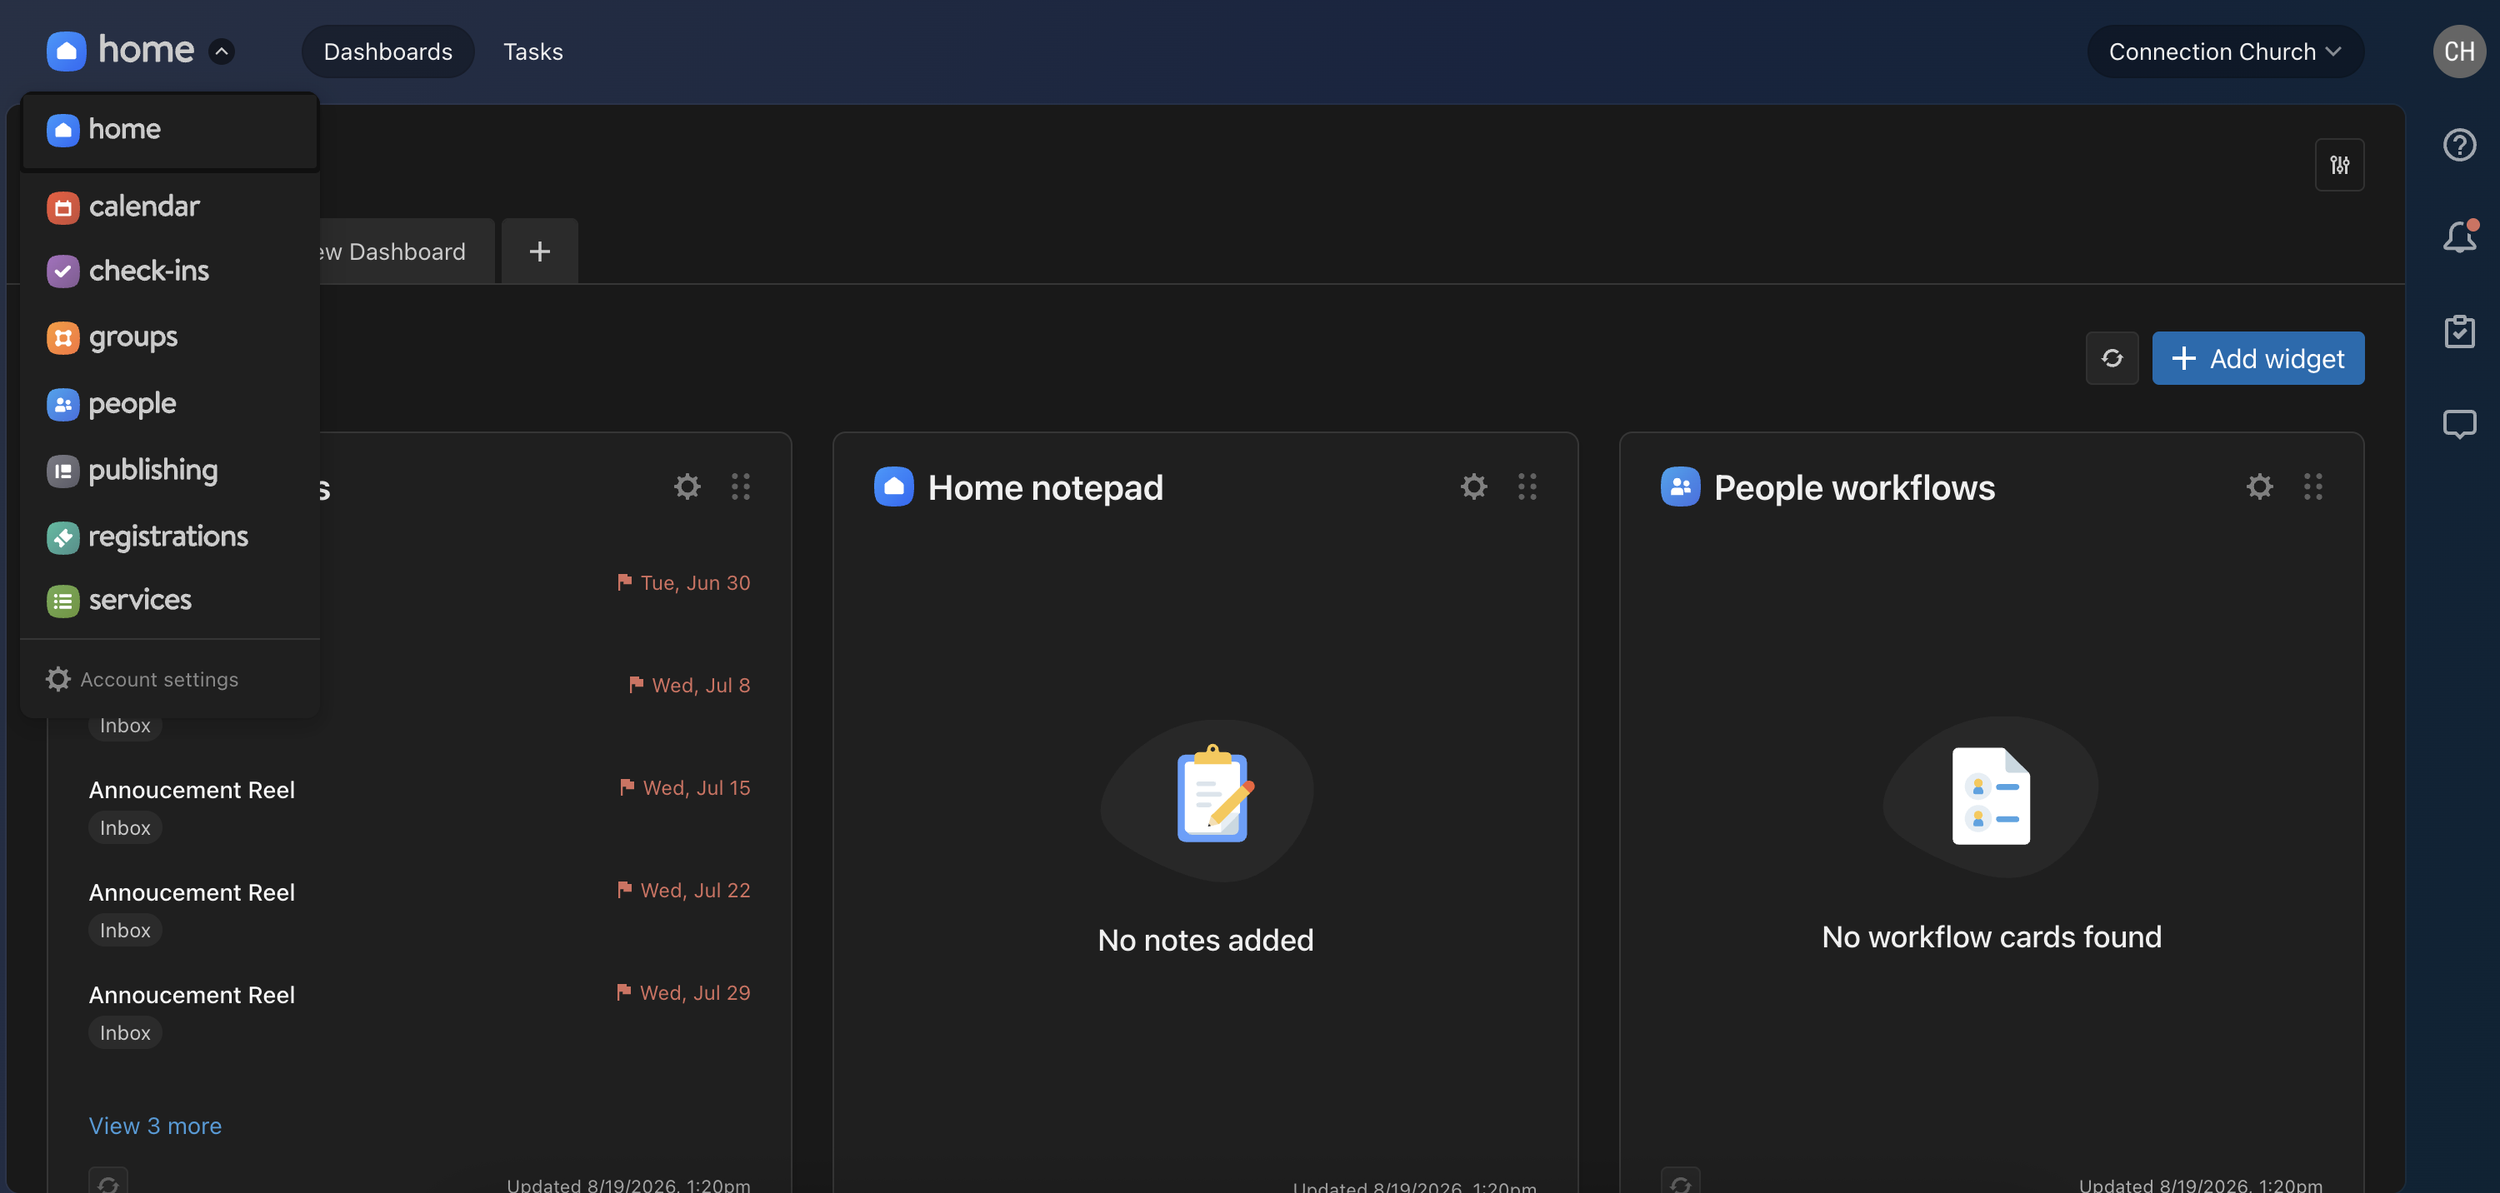
Step 3 - Navigate Events Page
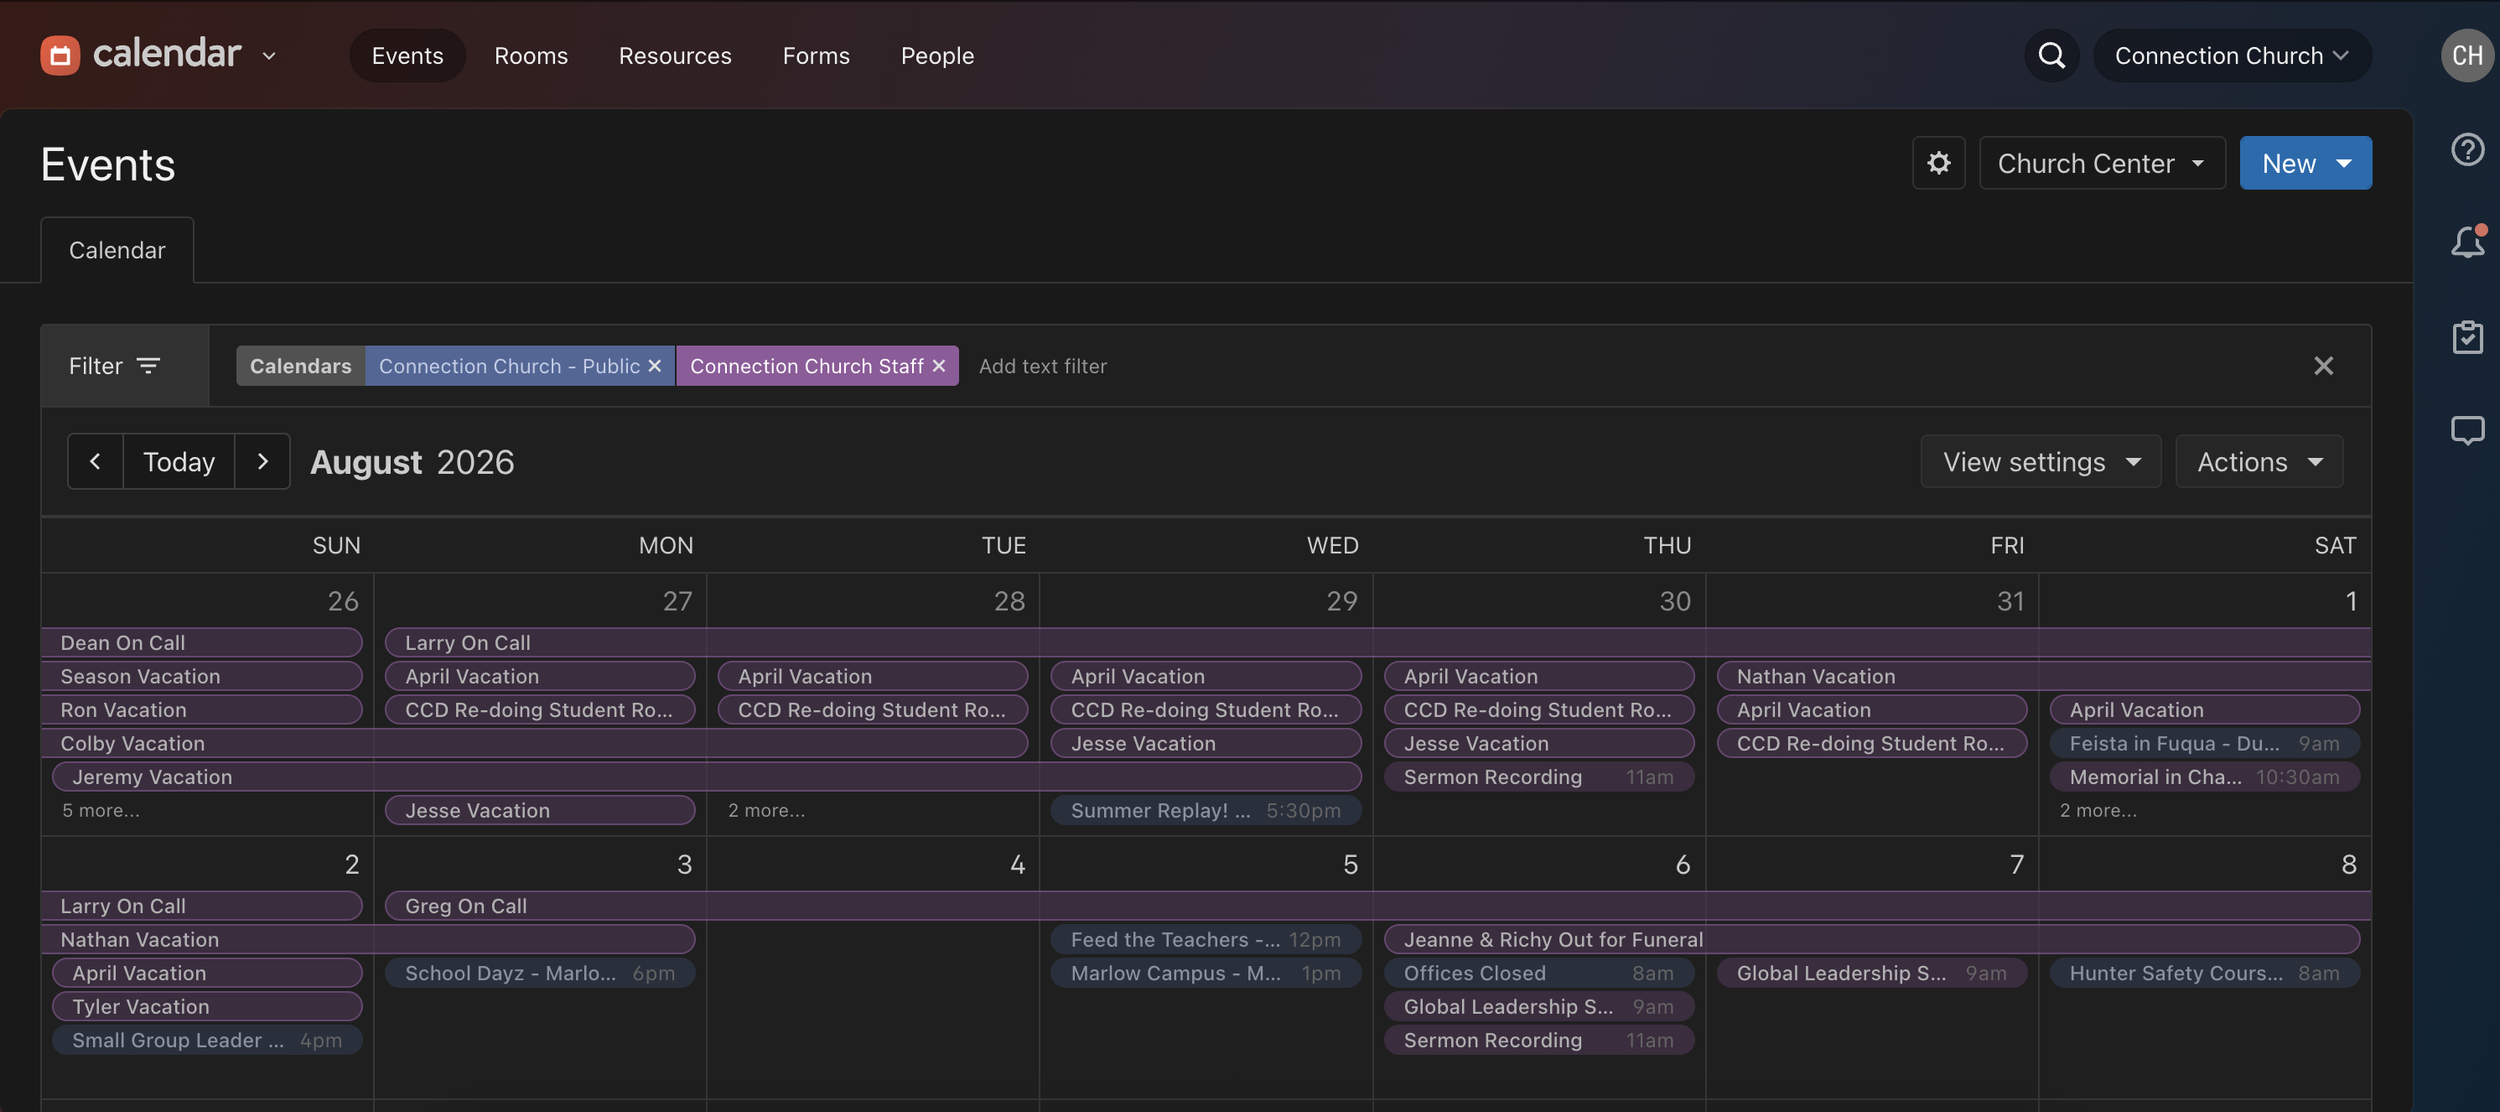
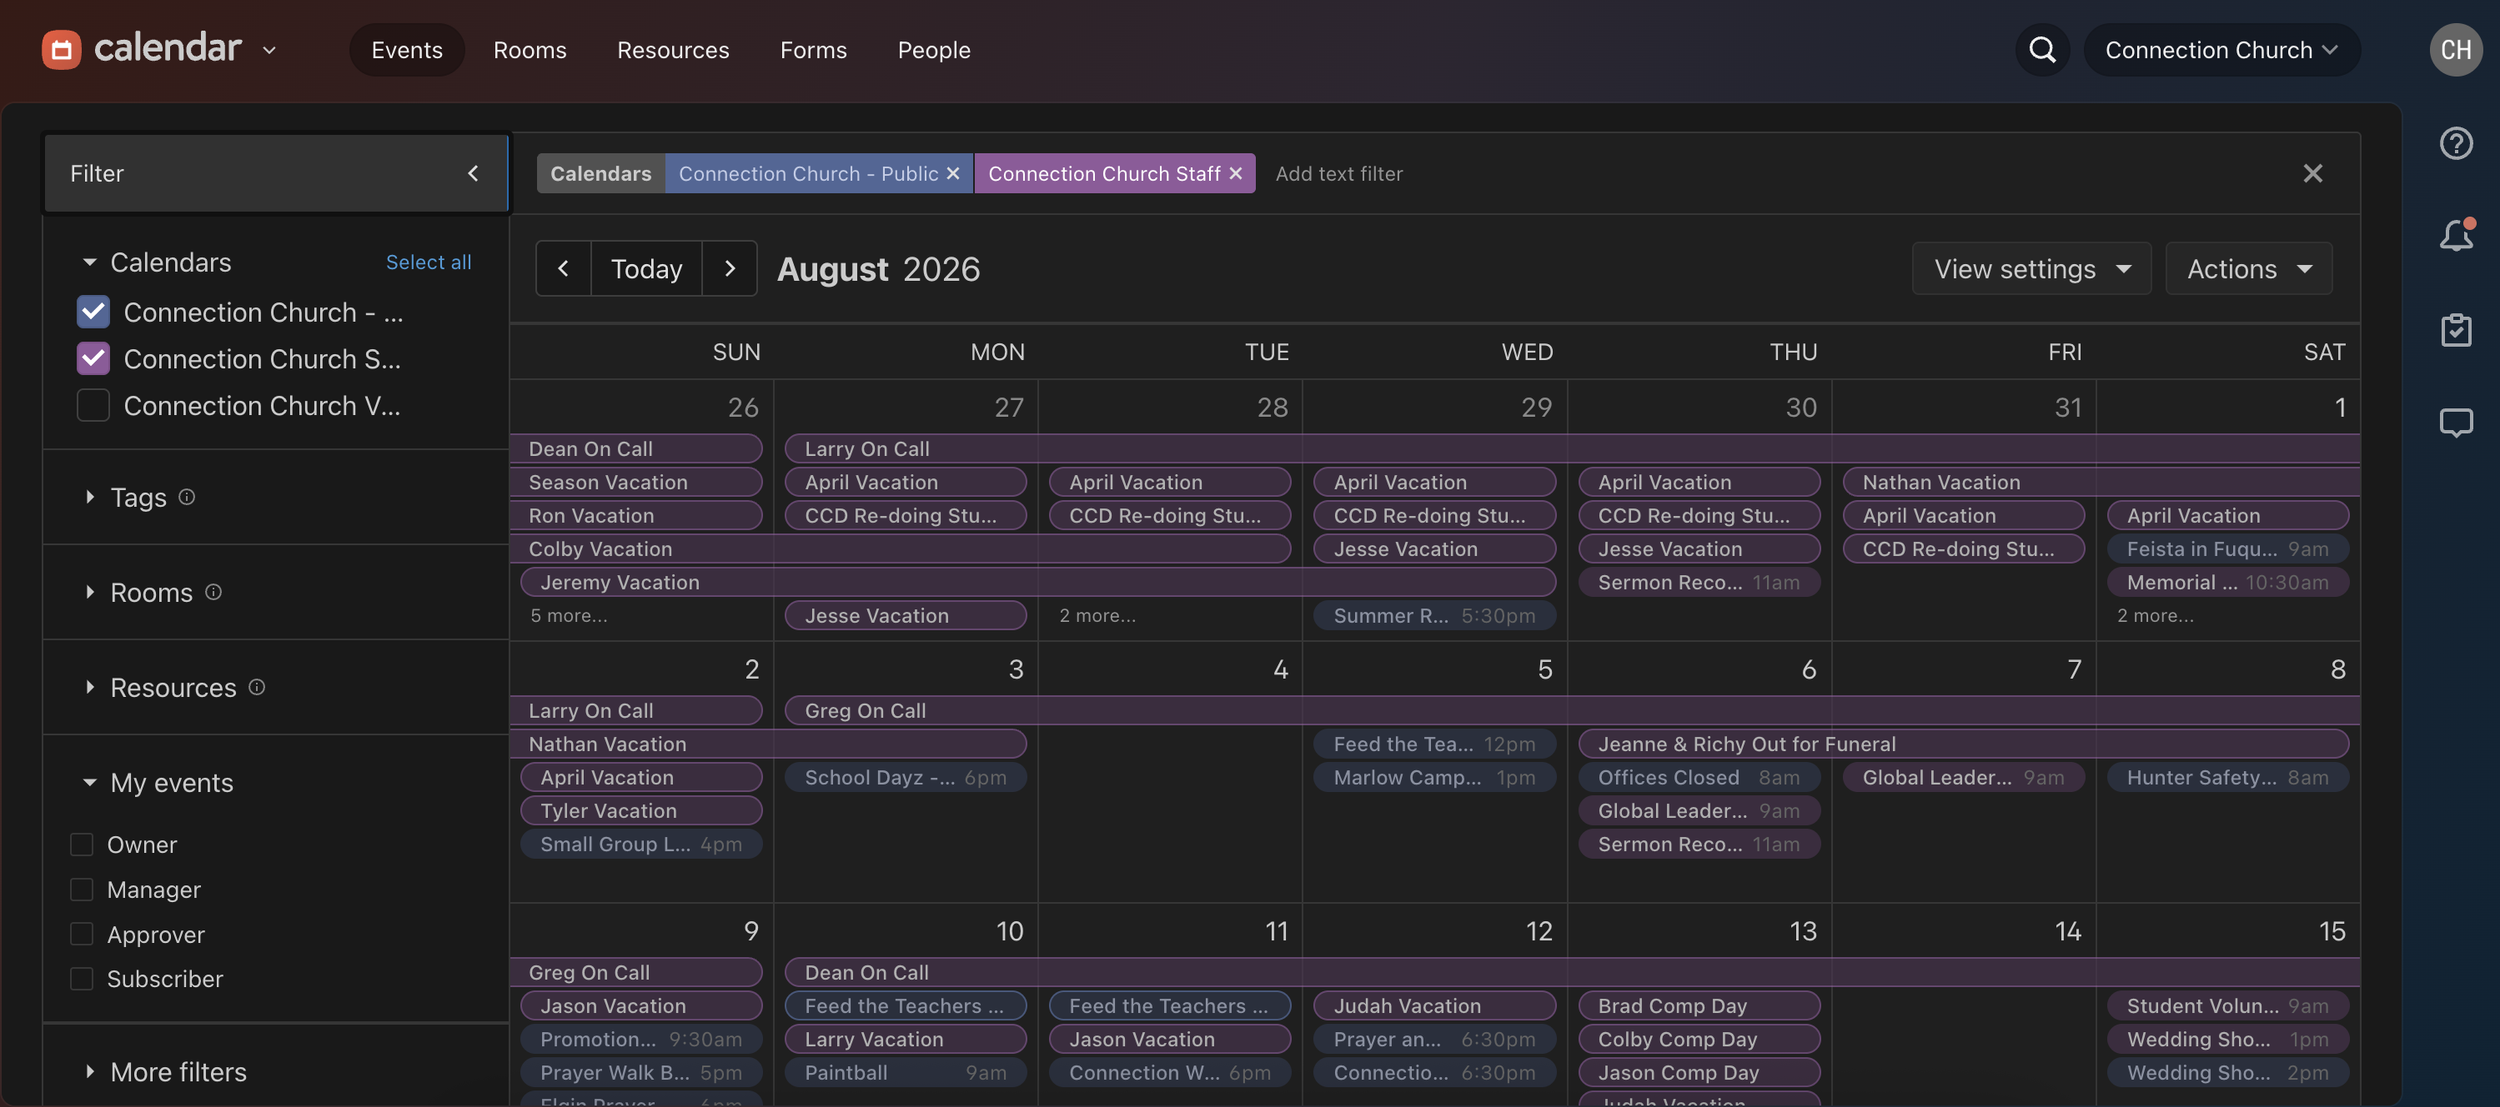
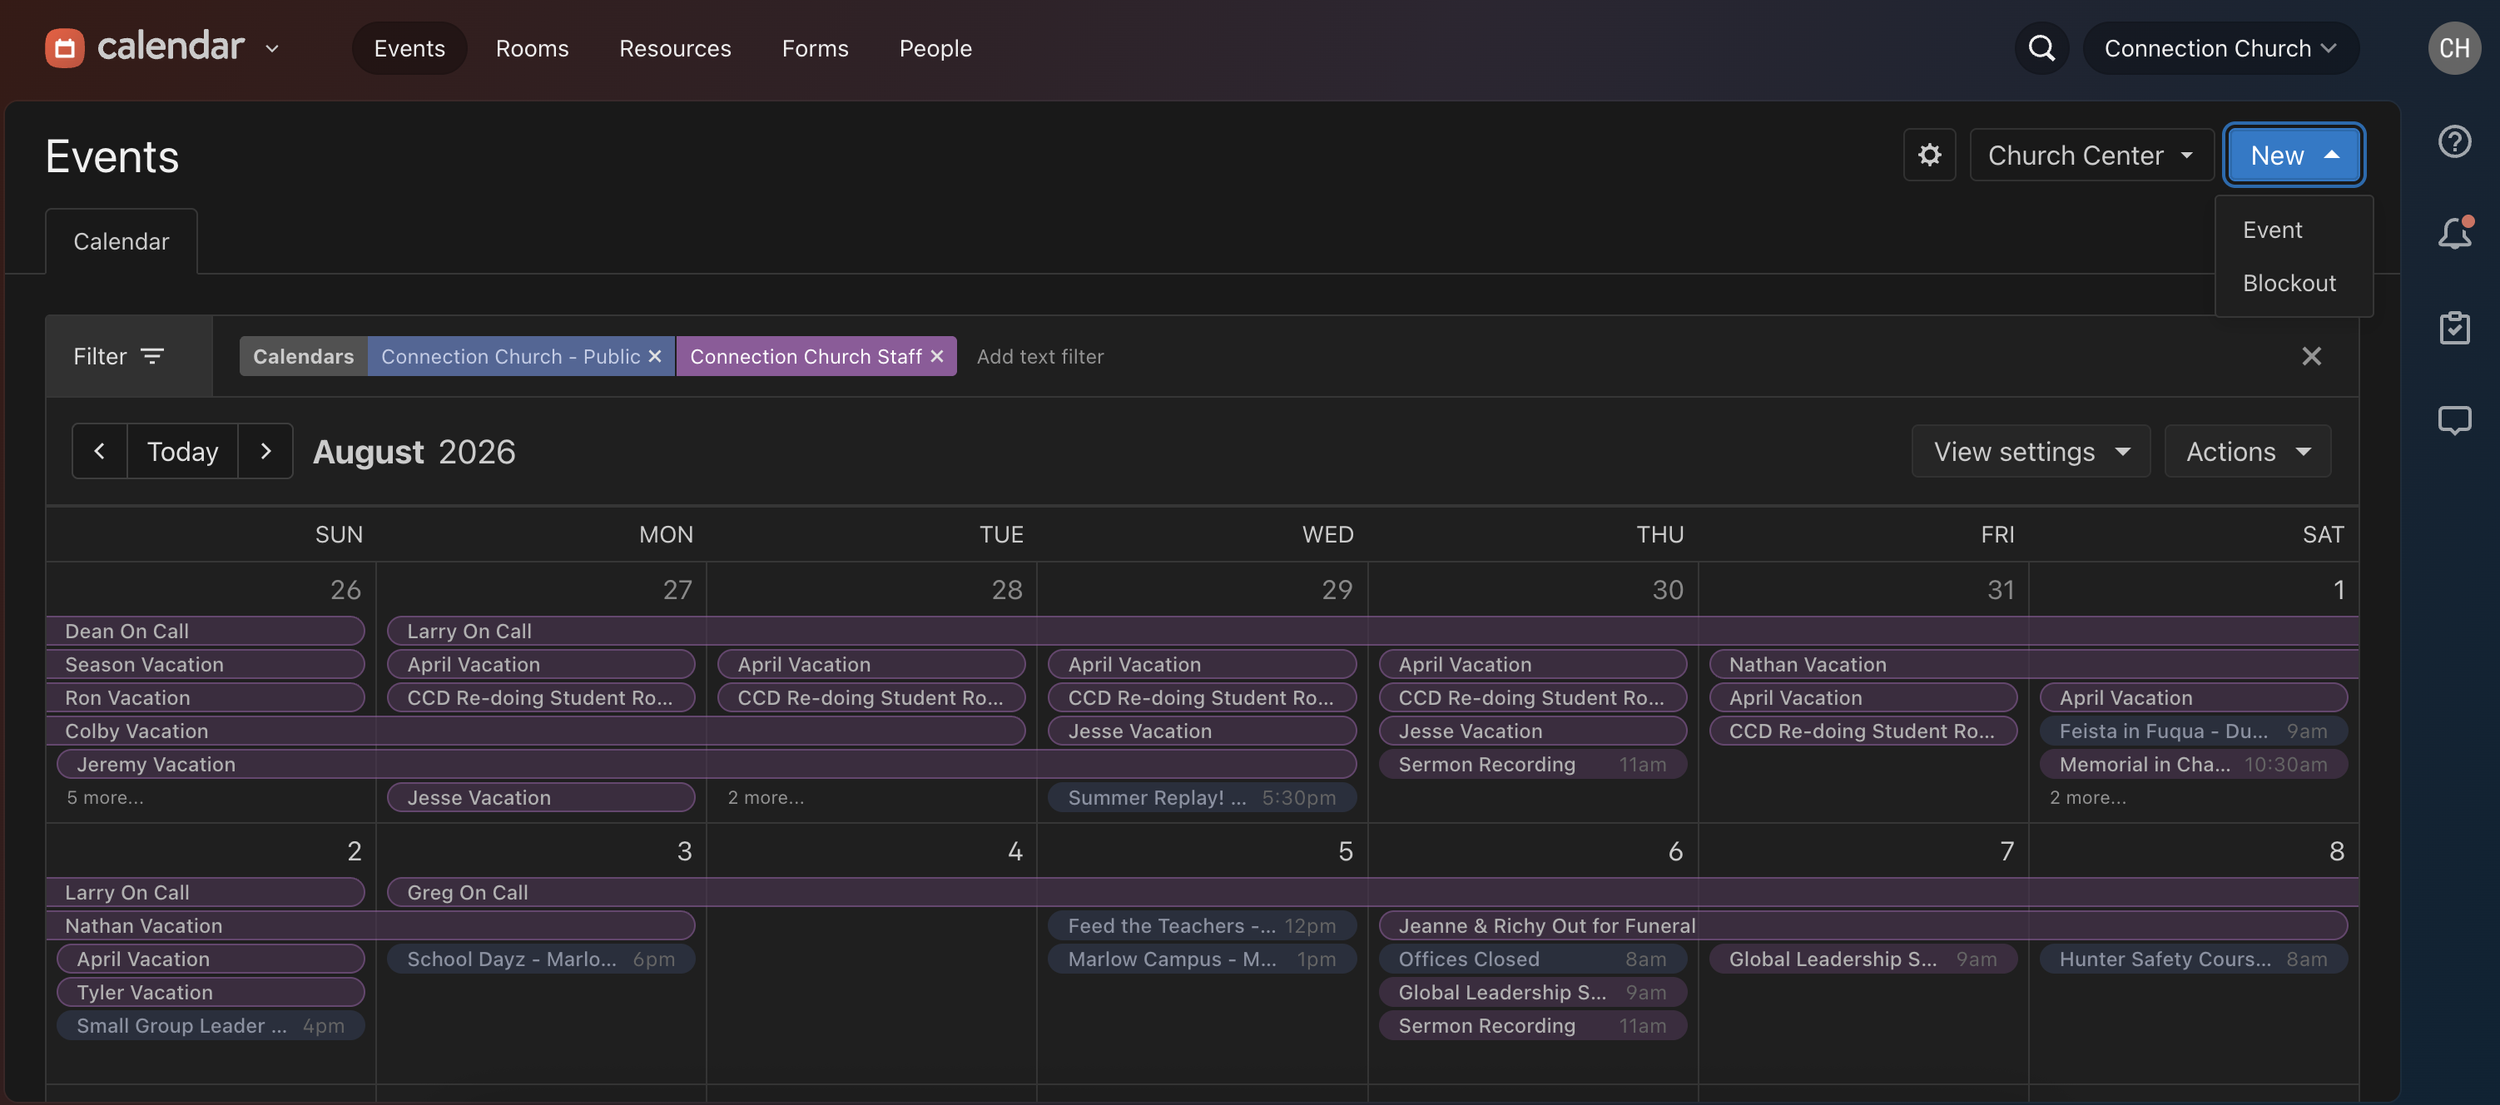
Step 4 - Select New
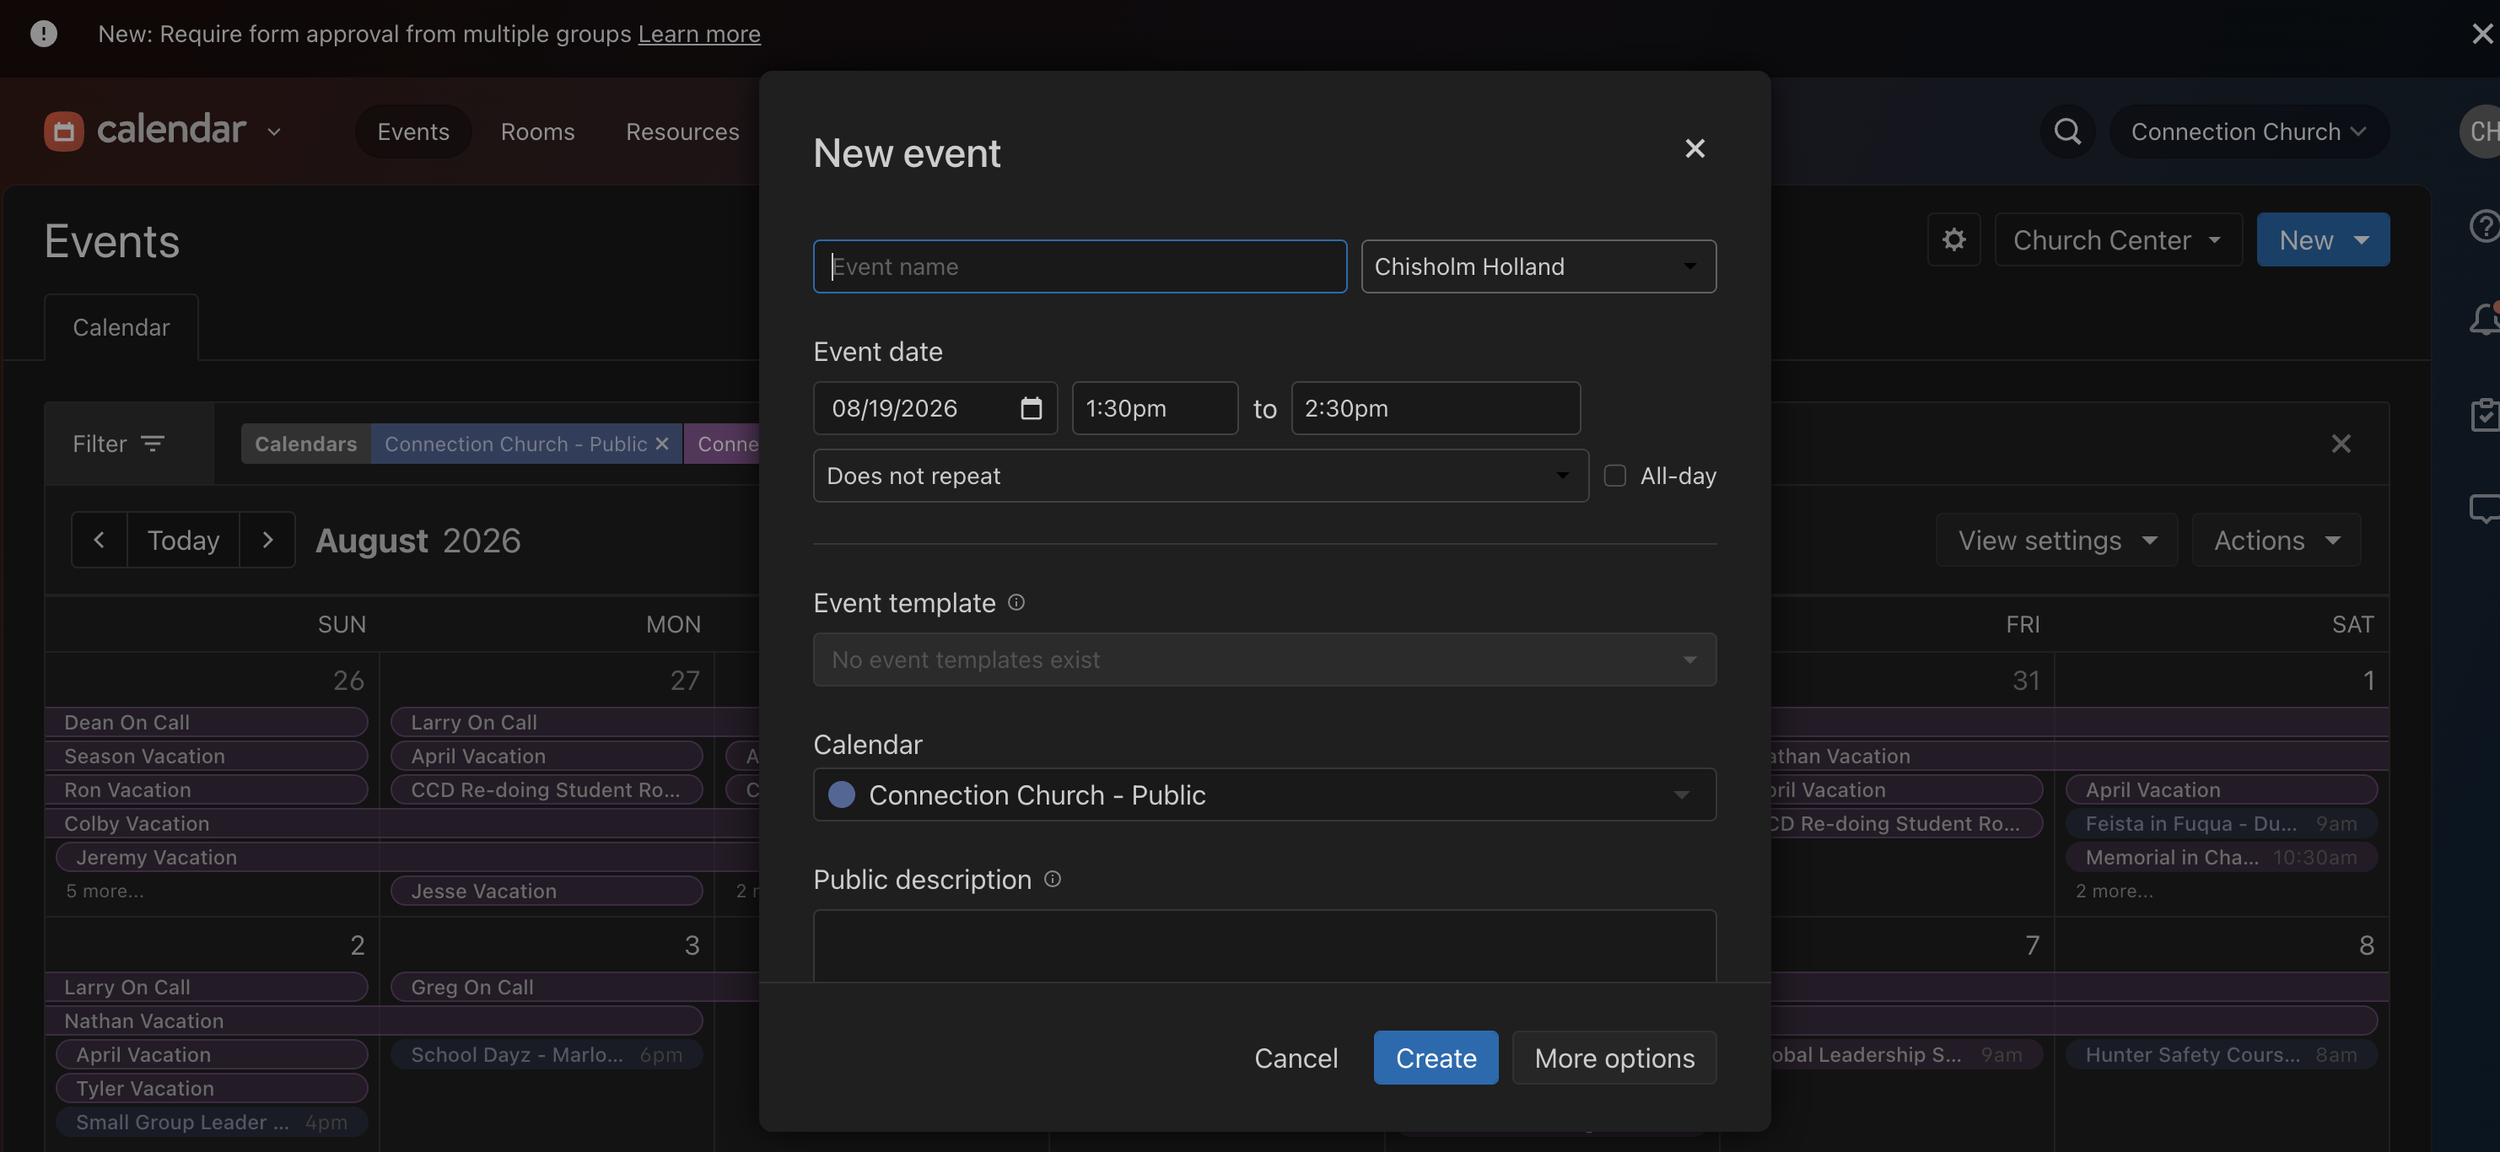
Step 5 - Name the Event
Step 5 - Date and Time
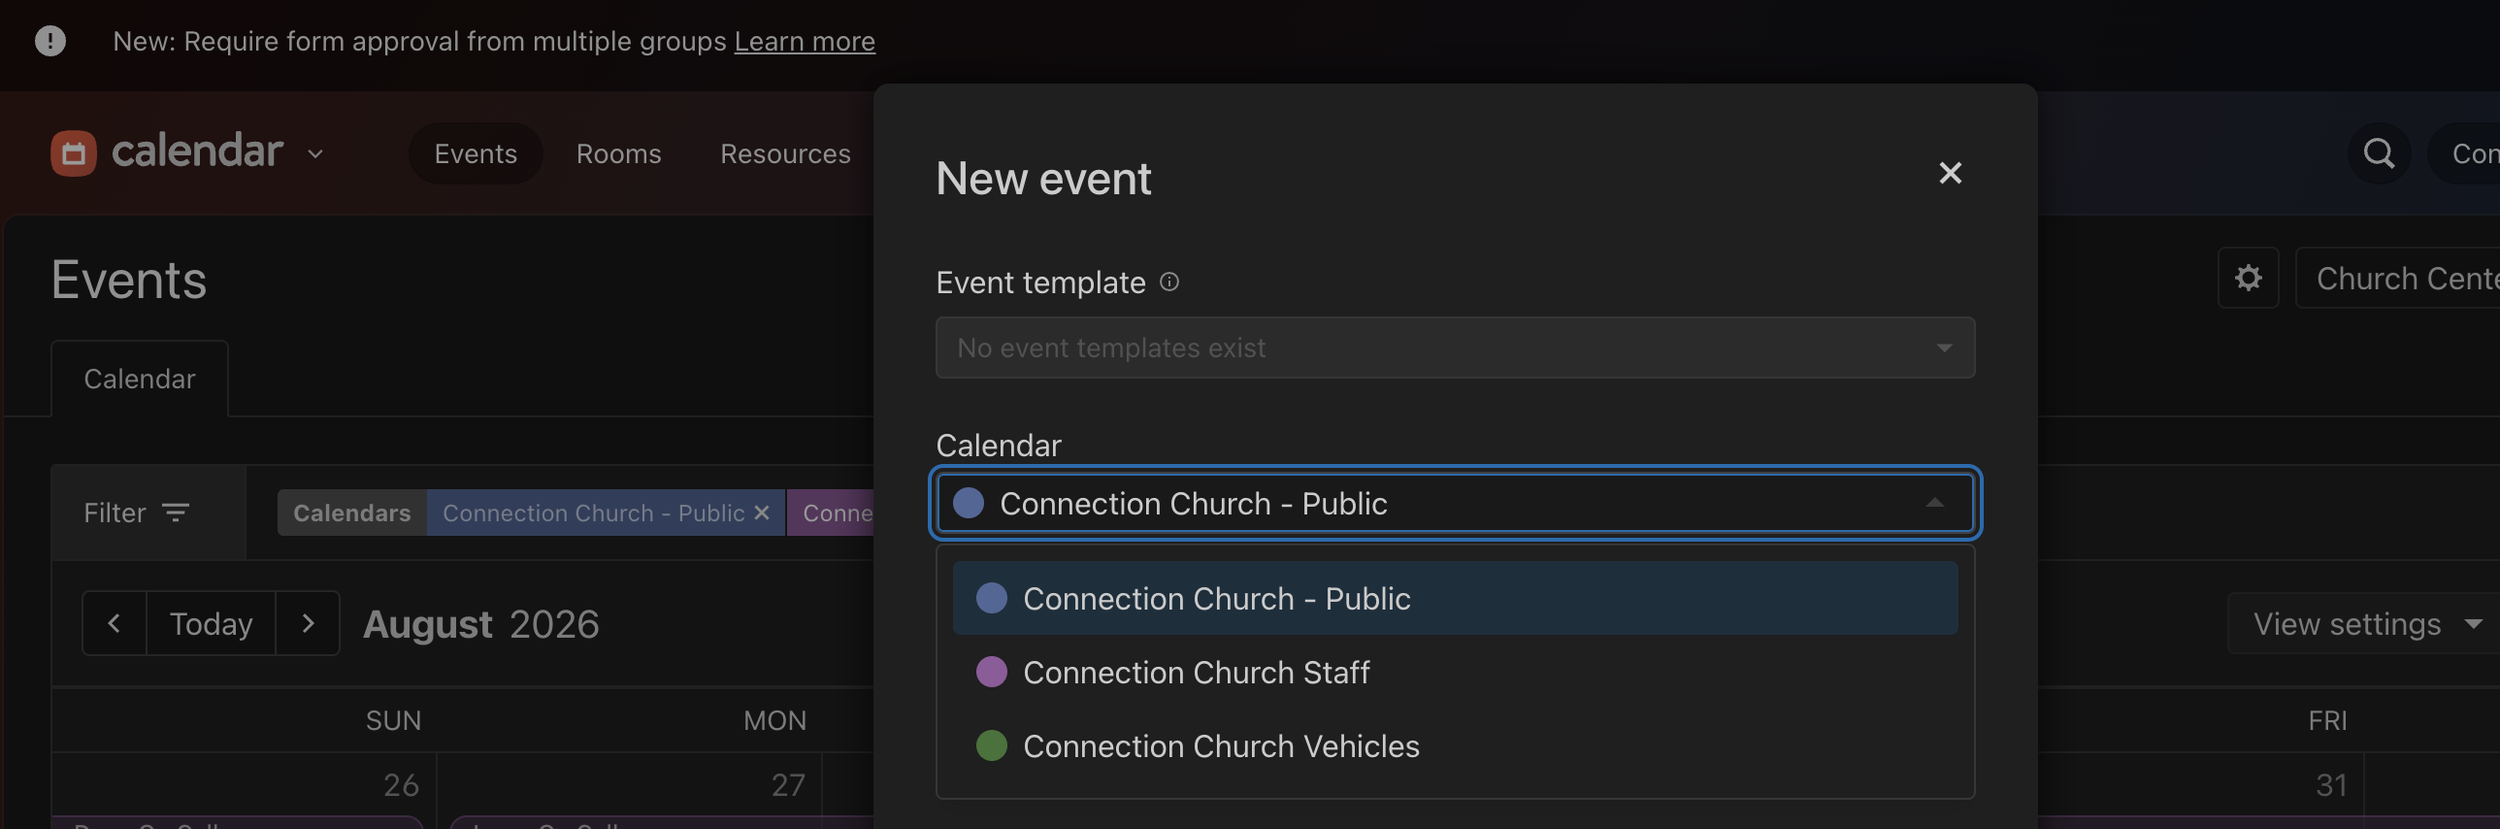
Step 6 - Select Calendar
Step 7 - Description
Step 8 - Location & Church Center Visibility
Step 9 - Tags
Step 10 - Hit Create!
Navigate on your desired internet browser to PlanningCenterOnline.Com and Sign In.
On the top left hand of the screen, select the drop down menu next to the ‘home’ icon and select calendar.
You will now be on the calendar page.
PS. Notice the ‘filter’ option on the top left. If searching for an event, you can turn on/off the public calendar, sort by campus, or many other filters to allow you only see what you need to see.
If you are a campus employee, it might be best practices to leave on the "tag” associated with your campus as to not see ALL campus events.
In the top right of the screen, you can select “new”, from there select “event”.
Here is the new event screen.
While filling out this section, please keep in mind all campuses see this so please follow the below formatting.
Submit the name of the event, followed by a hyphen, and then the campus the event is for. If the event will be attended by all campuses, just list the name of the event, hyphen, and the ‘all campuses’.
Bible Study - Clear Creek
or
Bible Study - All Campuses
In the Event date section you will be able to set the date and time of the event.
Multiple day events you can select the “all day” option and instead of a start time and end time you can select a start date and end date, IE camps/retreats. In this case, you will list the start and end time of the event in the description.
You can also set it to repeat, an example of this might be your MDWK programming.
If this is a staff only event, list it on the staff calendar.
If you are reserving a vehicle, use the vehicle calendar.
If you are creating an event for anyone else, put it on the public calendar.
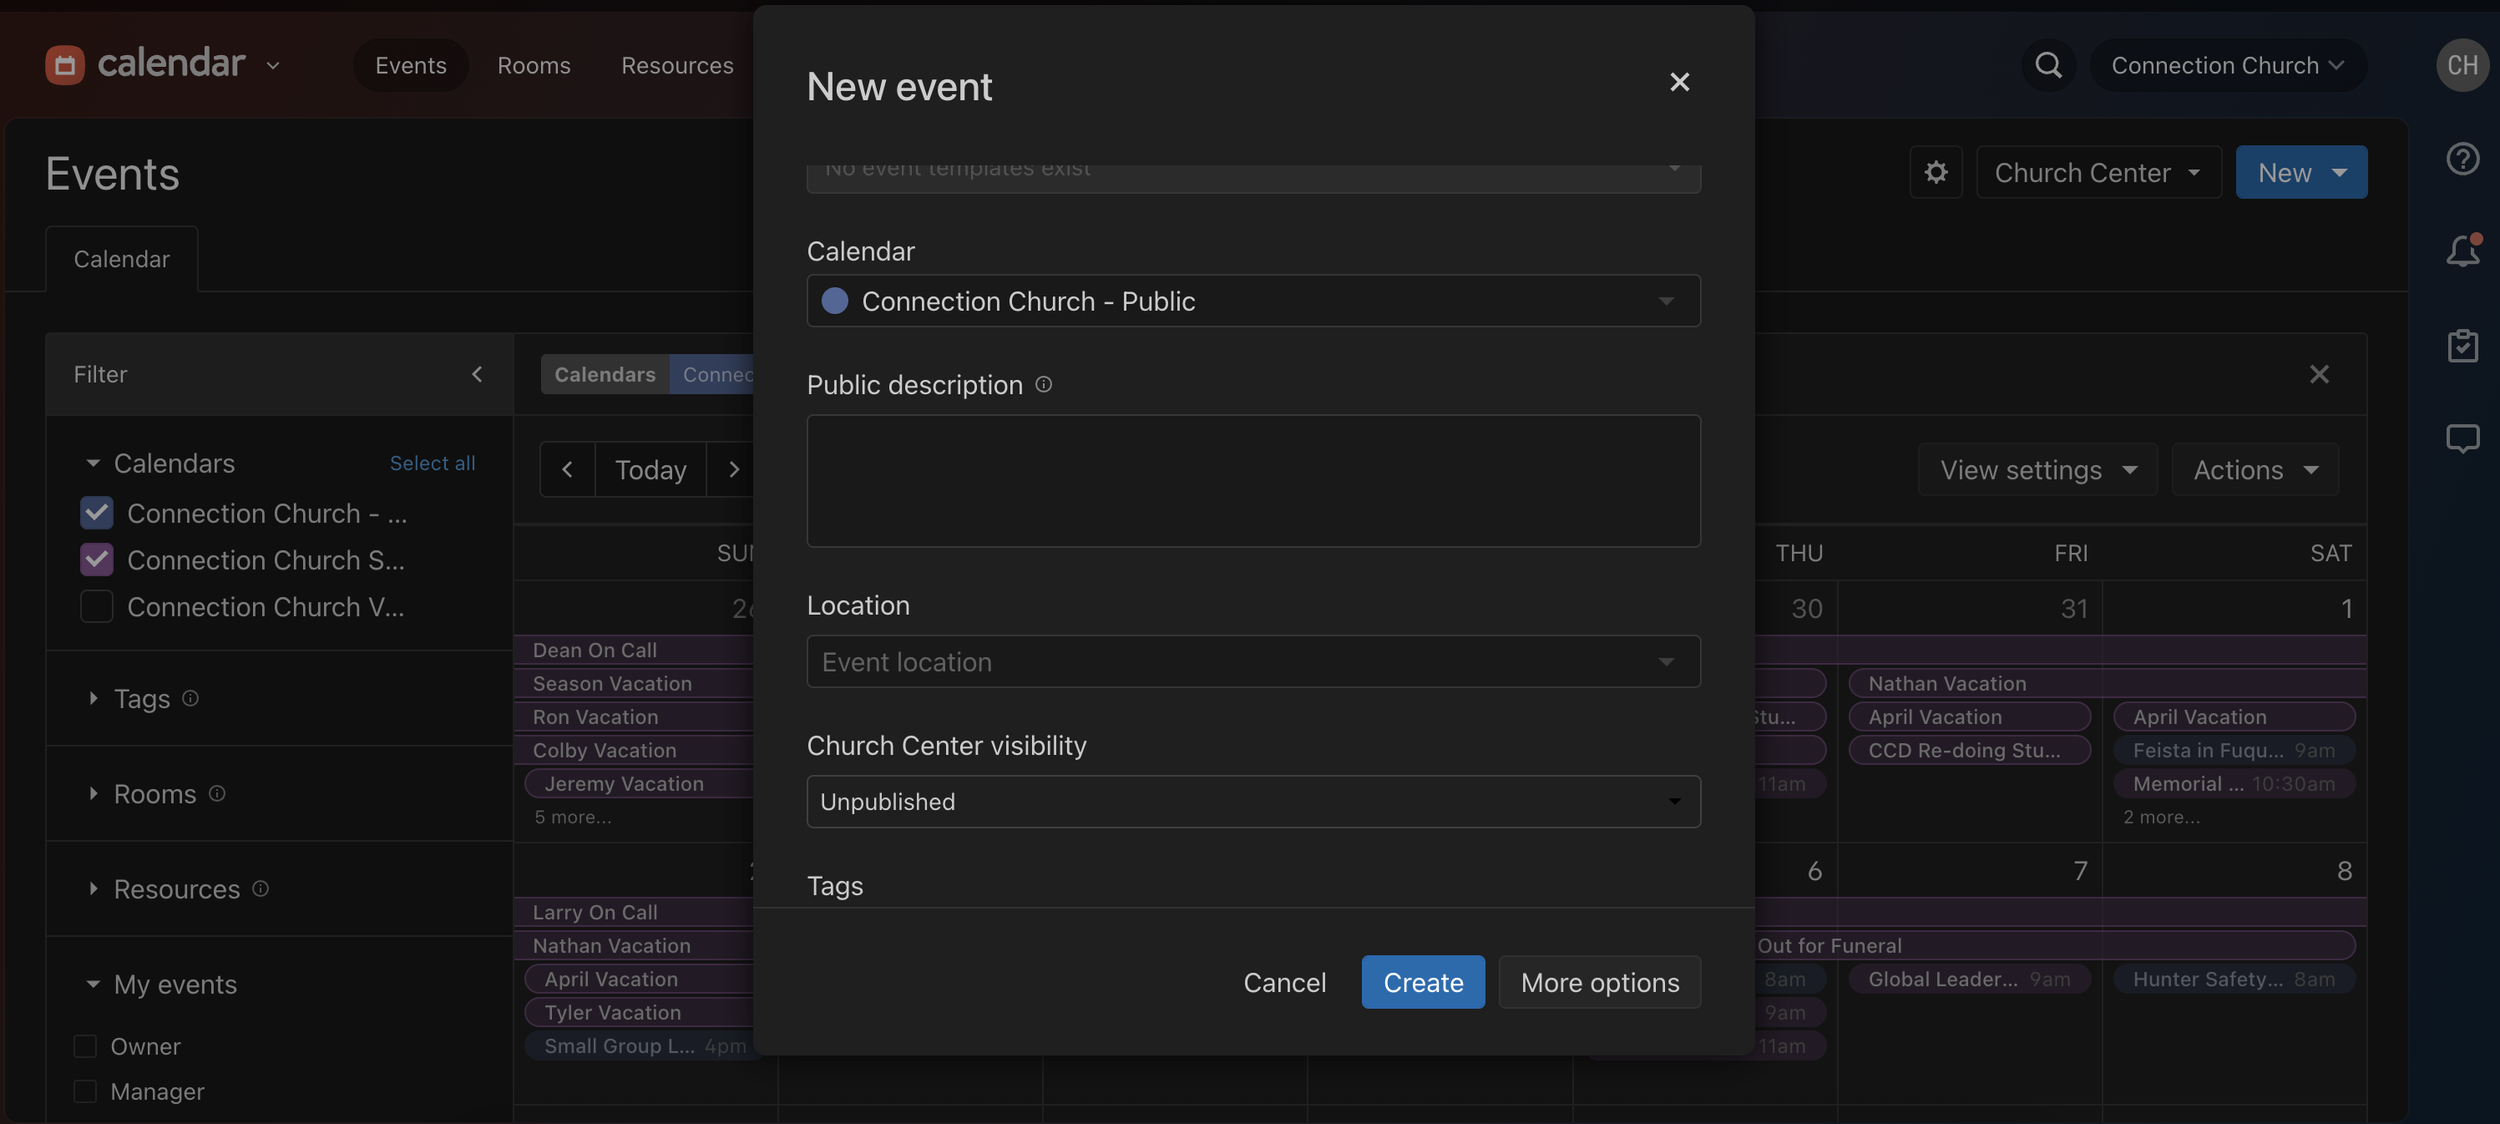
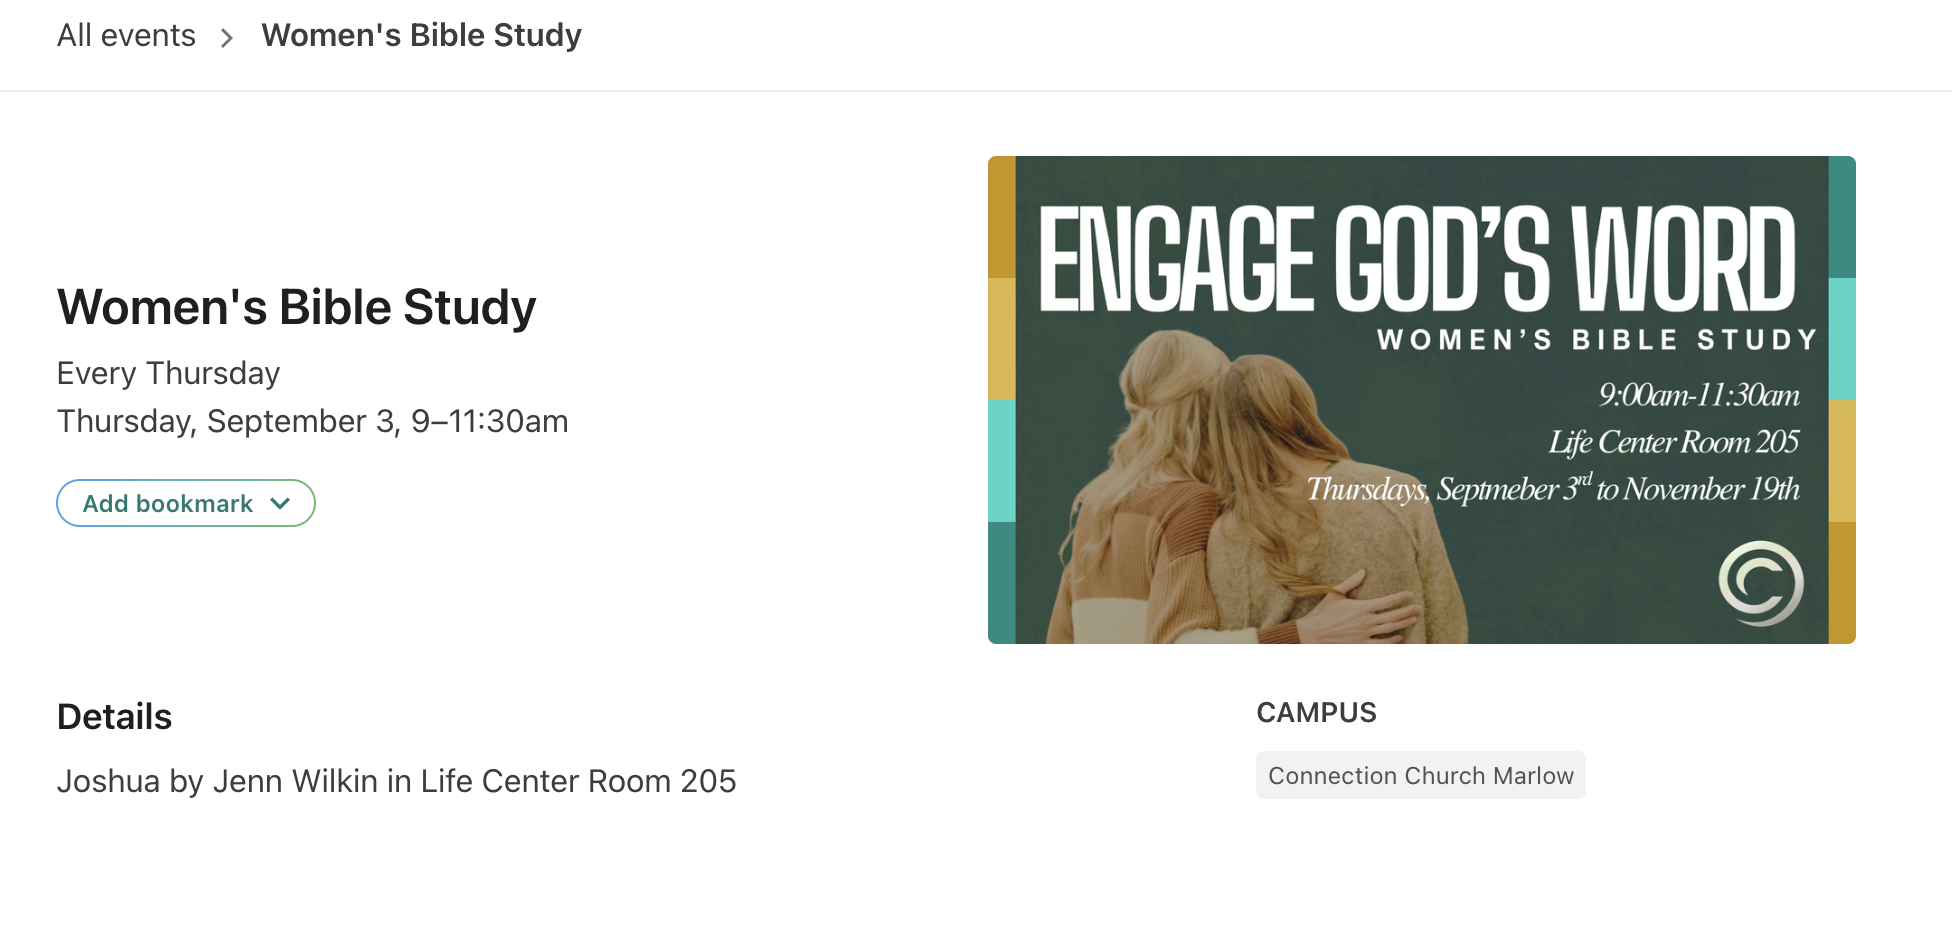
Public description will show up in the “details” event on the calendar as show in the second image. It might be best to answer all the questions below not only for your volunteers & attendees but for other staff as well to have a clear picture on what is happening.
Think of a few things when writing in this area.
Event Location/Room NumberWill there be food?
Will there be childcare?
Will there be a cost associated?
Any other additional details, links, or anything else can be included here.
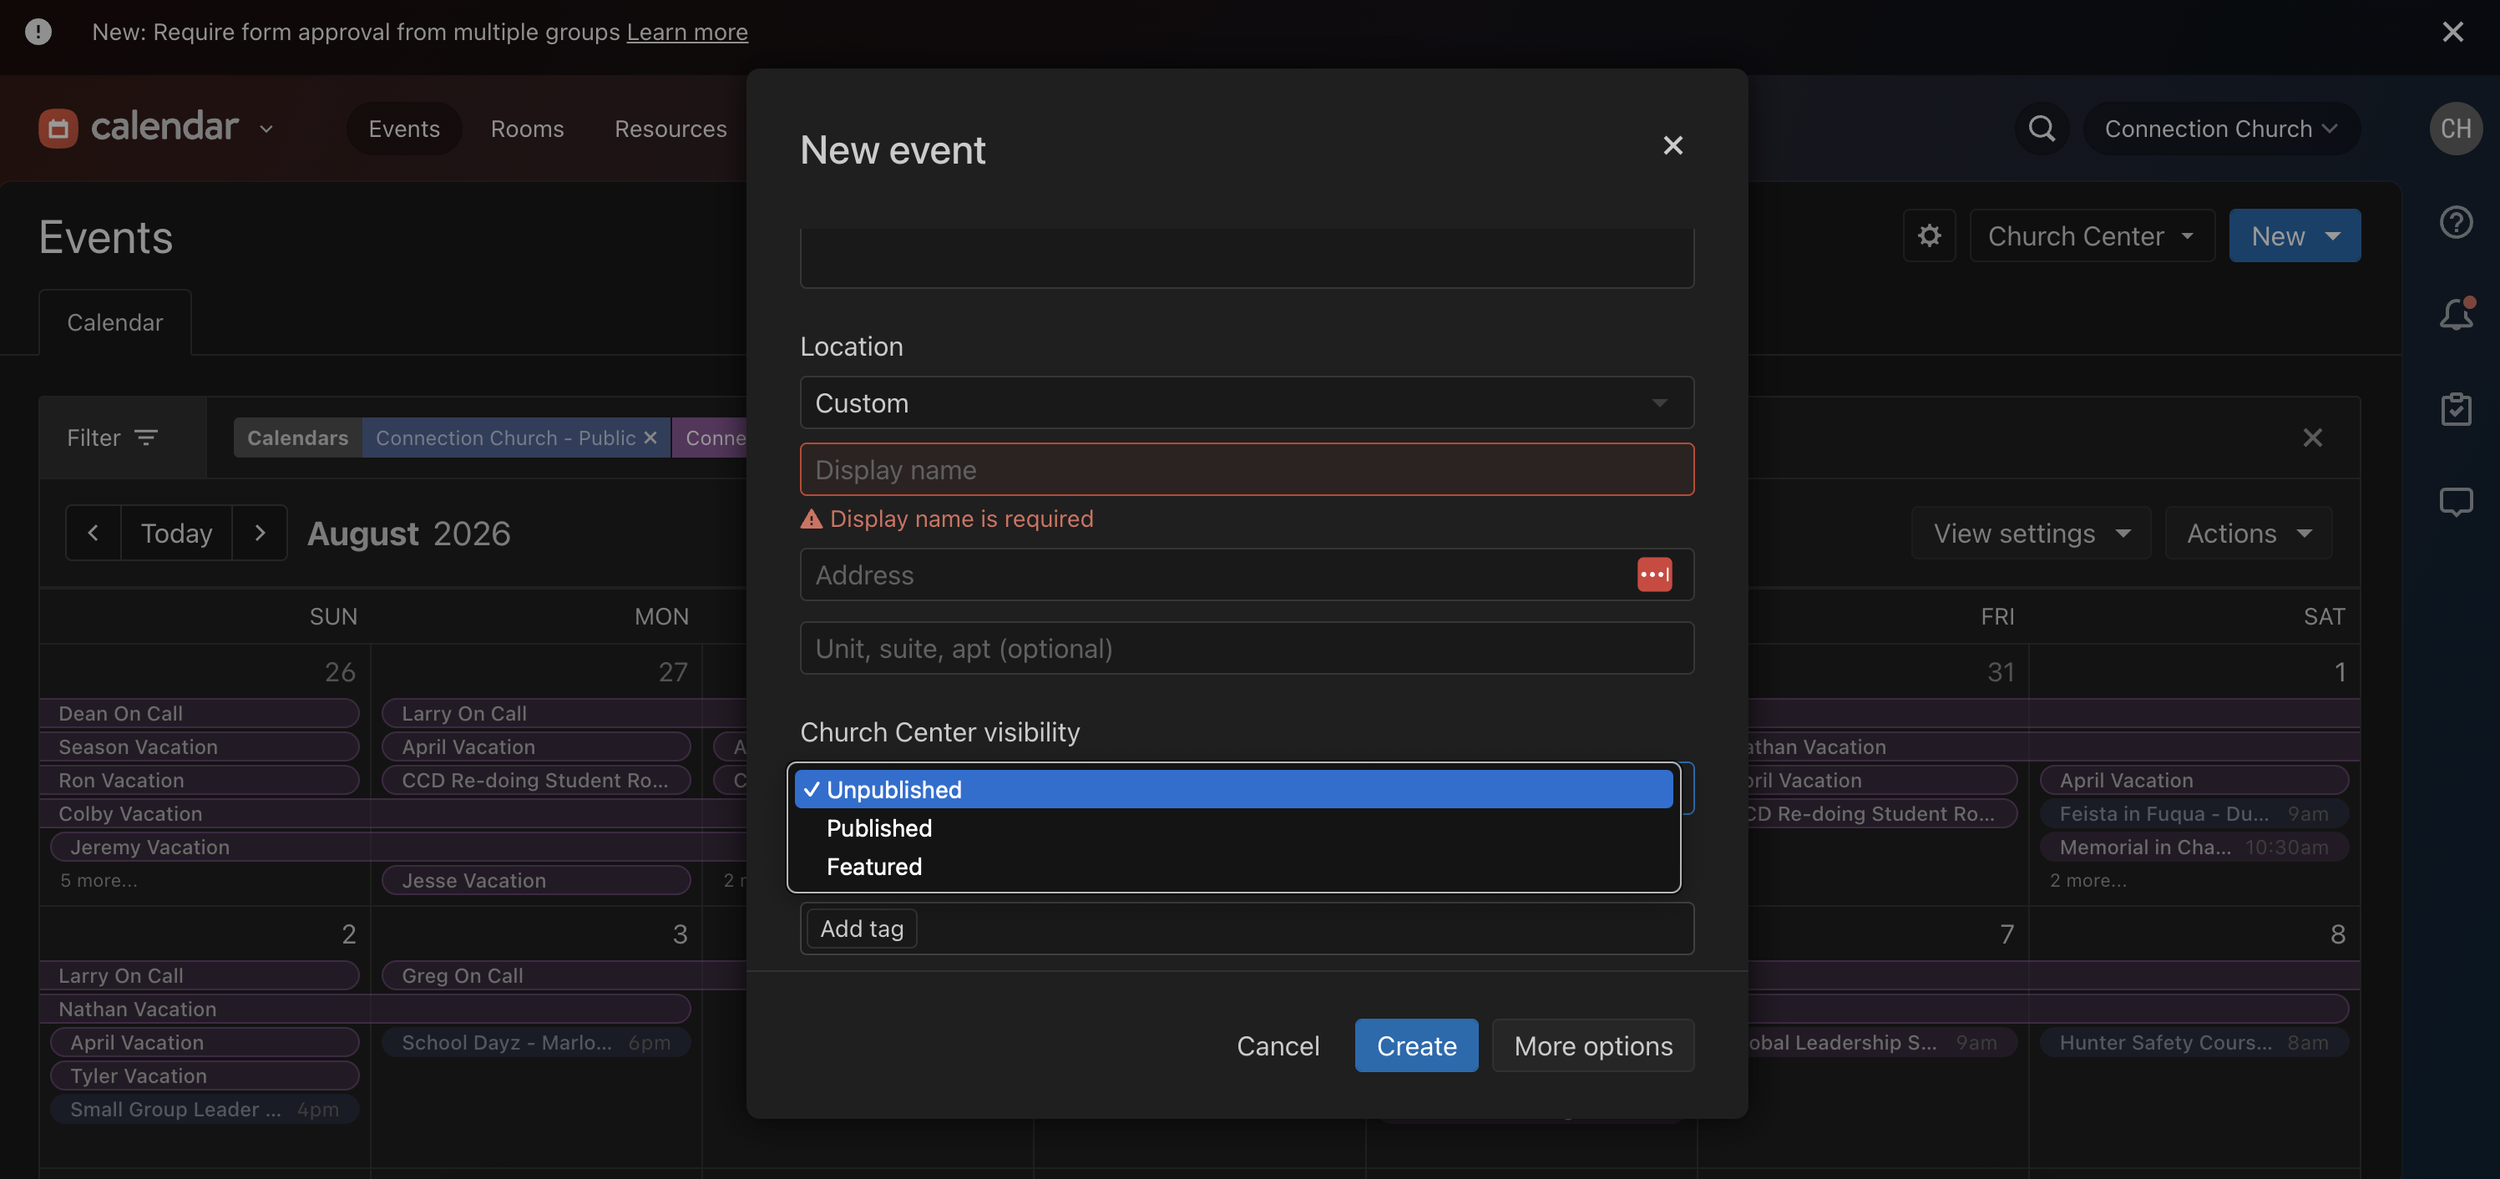
Location will allow you to select one of our churches or submit a custom location. If using a custom address, you will be required to give it a ‘display name’ for example
Falls Creek
6714 Highway 77D, Davis, OK 73030
‘Church Center visibility’ is what allows it to populate on our website. If your details aren’t finalized yet, you can leave it unpublished. In that senario, only people looking at the staff side of planning center will be able to see it.
However, if you list it as “published” it will automatically populate on the website.
Featured will make it populate at the top of the calendar even if it is not the next event by date. Please ask before setting an event as featured. This option should not be used.
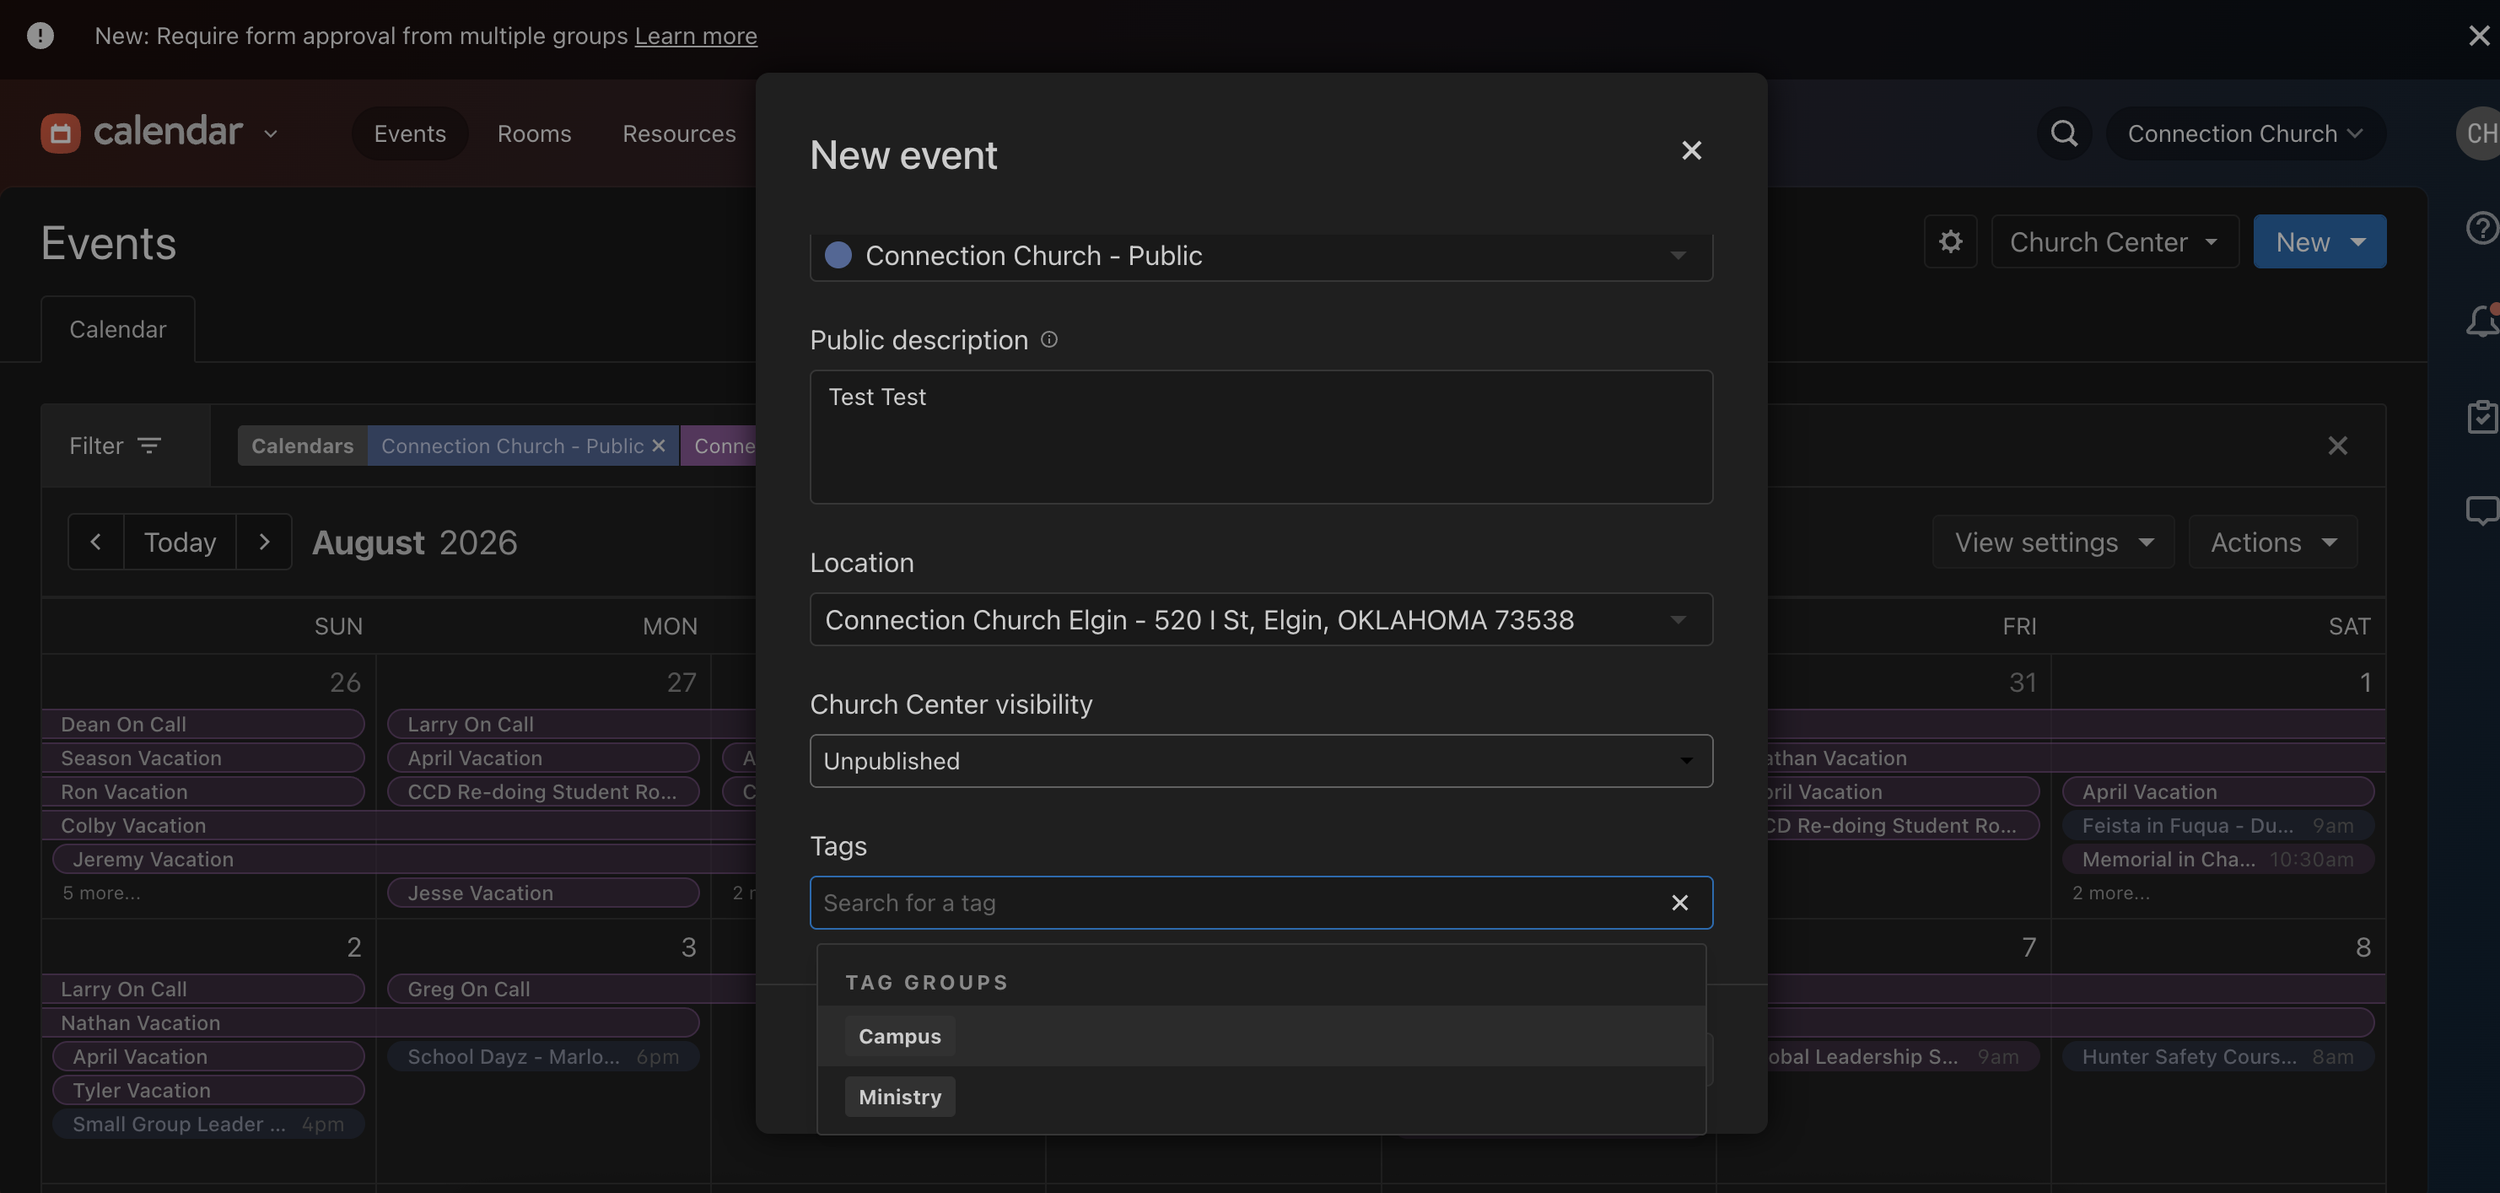
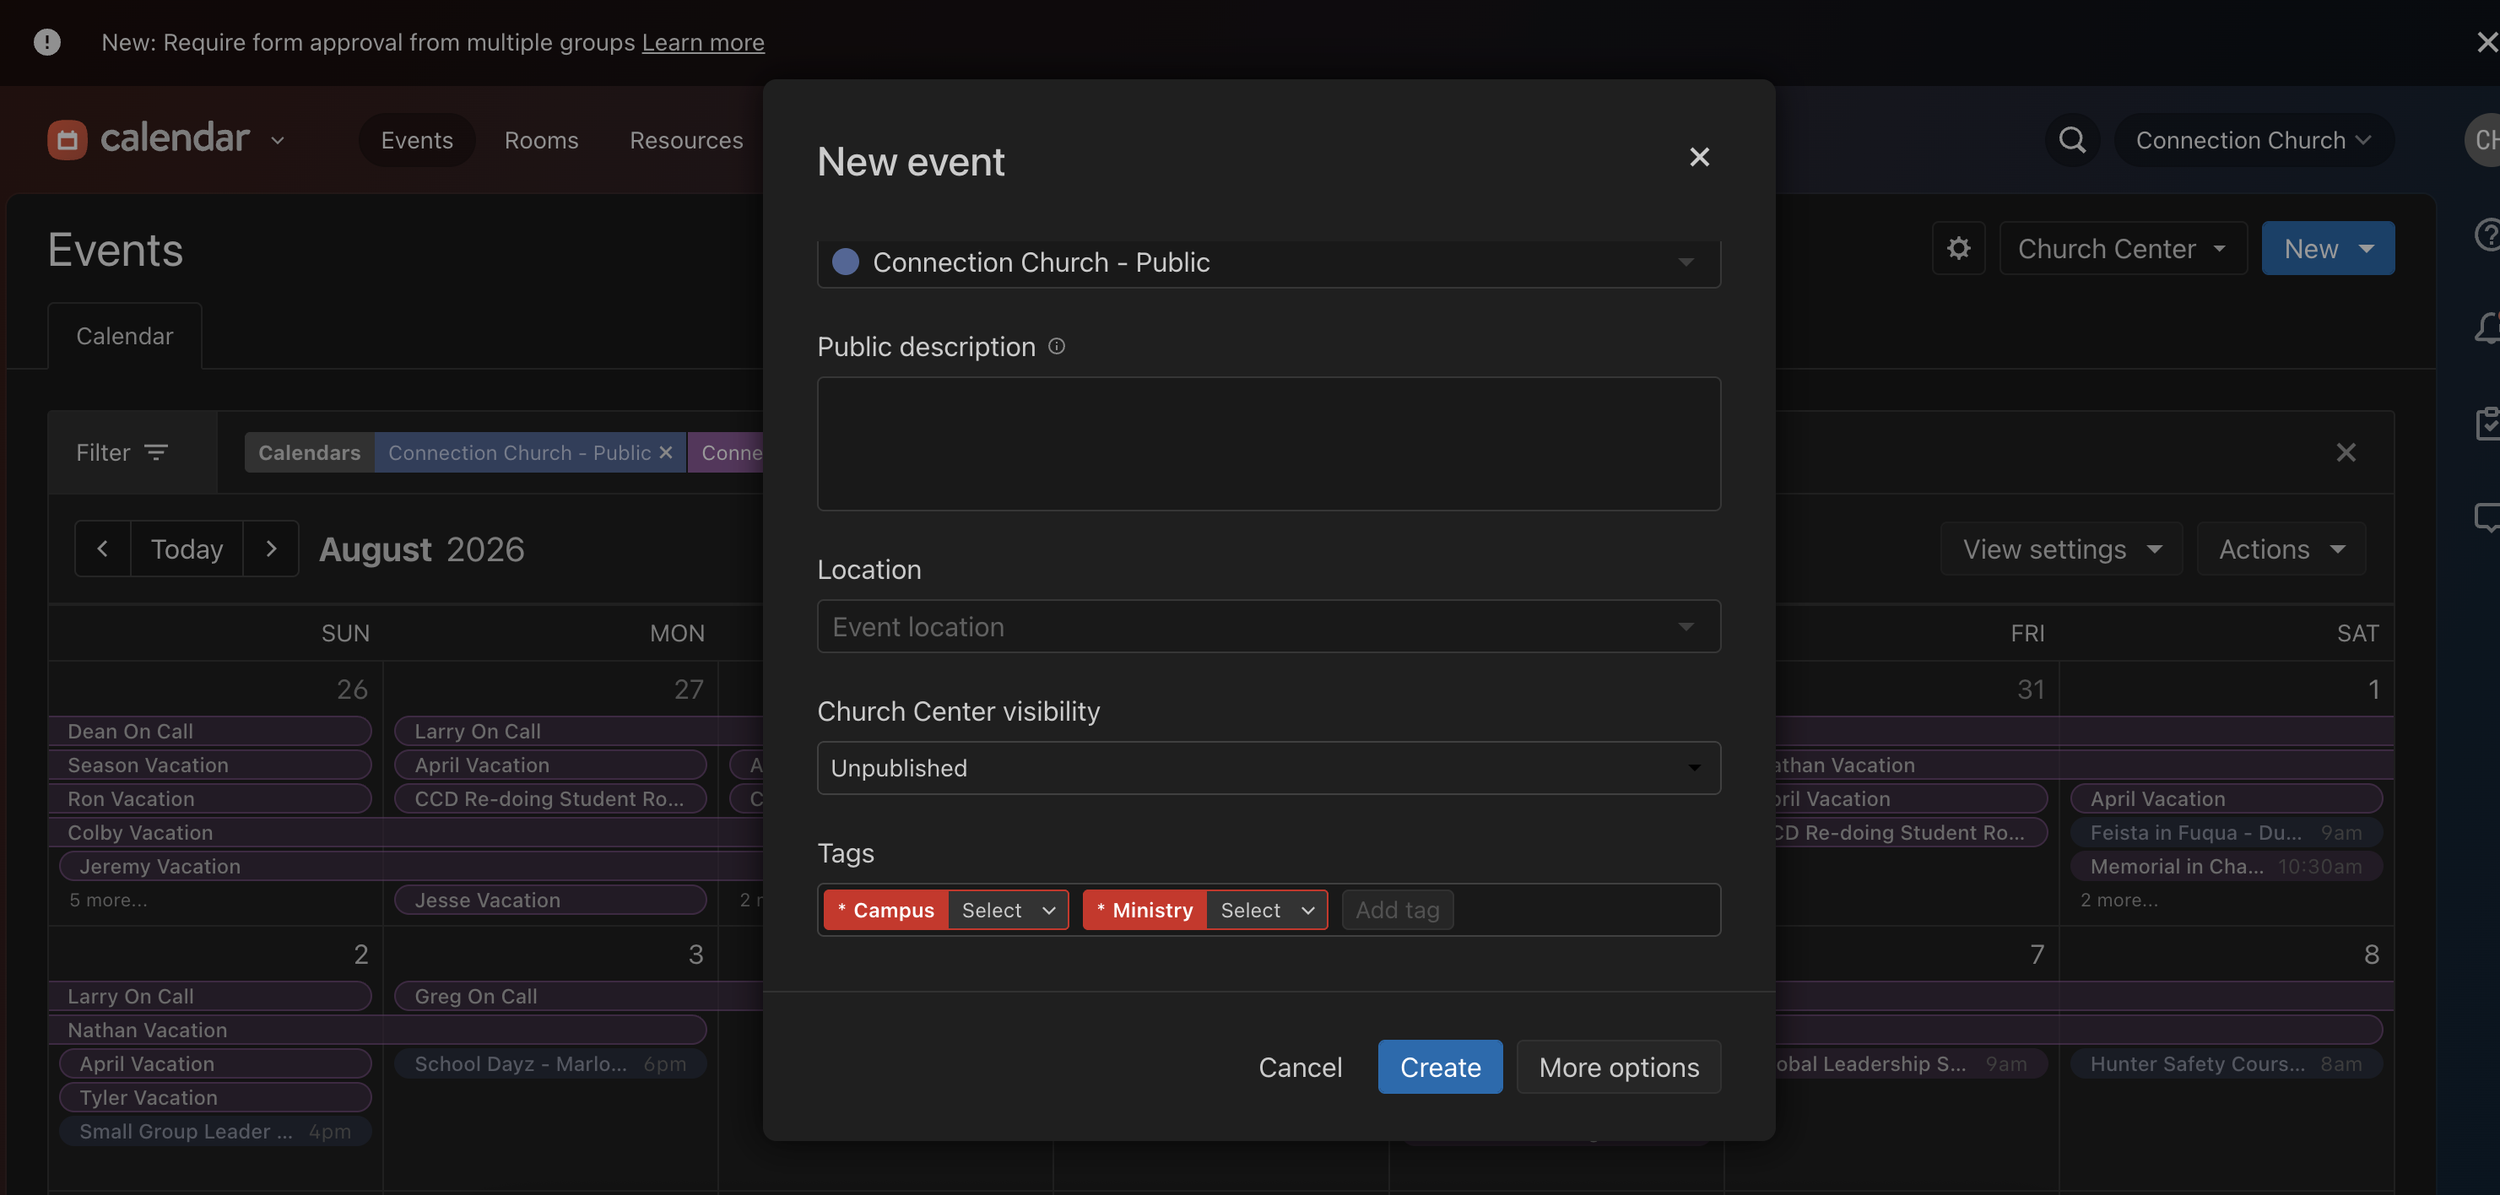
TAGS ARE REQUIRED.
You will have two tag groups to use, campus & ministry.
Campus you will select each campus members that will attend the event.
Tag it to the ministry that is attending the event.
Hit create!
Your event should populate in a few seconds on
https://www.connection.life/events
I will check daily on events and create artwork as events are created. No need to email, just allow me 48-72 hours and I will add it to your event and email it to you as well.
With any questions, email me.
Chisholm@connection.life